
How to Create a New Zoho Email Account for Personal Use
How to Create a Zoho Mail Account
for Personal Use — Complete
Beginner’s Guide
Want a clean, ad-free, privacy-first email account? Zoho Mail is one of the best free alternatives to Gmail and Outlook. This guide walks you through every step — from signup to your first secure email.
Need Business Email? Talk to Avinya →In today’s always-connected world, your email address is your digital identity. Whether you’re a student managing coursework, a freelancer communicating with clients, or an individual building a personal portfolio — having a dependable, secure, and ad-free email account matters more than most people realise.
Zoho Mail has quietly become one of the most trusted free personal email services in the world — and for good reason. It gives you a professional inbox experience without the surveillance advertising that dominates competing platforms. In this complete step-by-step guide, we walk you through exactly how to create a Zoho email account for personal use — from signup to a fully configured, secure inbox.
🌟 Why Zoho Mail Stands Apart from Gmail and Outlook
Before jumping into the setup steps, here’s a clear picture of what makes Zoho Mail the preferred choice for millions of users who want a cleaner, safer, and more private email experience:
📋 Step-by-Step: How to Create Your Zoho Mail Account
Follow these five steps and you’ll have a fully working, secured Zoho personal email account set up and ready in under 10 minutes:
Zoho Mail — clean, ad-free inbox ready in minutes
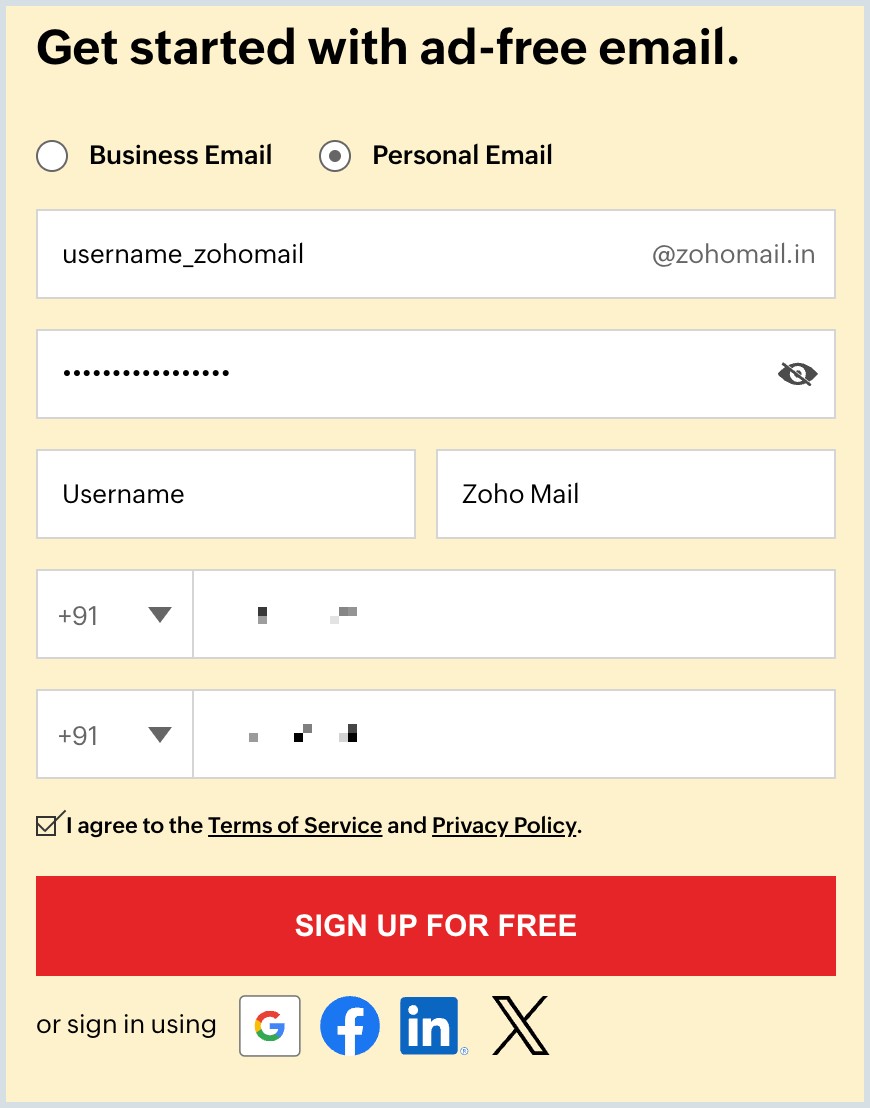
Open your browser and navigate to mail.zoho.com. On the homepage, you’ll see options for both Personal and Business accounts. Look for the “Sign Up for Personal Email” option and click it — this takes you to the free personal account registration page with no domain or credit card required.
Complete the registration form with your basic information. Here’s what you’ll need to provide:
Once all fields are filled correctly, click the Sign Up button to proceed to verification.
Step 2 — Fill in your details on the Zoho Mail registration form
Zoho will send a one-time password (OTP) to the mobile number you entered. Check your SMS inbox, enter the 6-digit code in the verification field, and confirm. This step both secures your new account and links your mobile number for future password recovery — so make sure you use a number you actively own and access.
After successful verification, Zoho redirects you directly to your new inbox. Take a few minutes to personalise the experience and set it up the way you want it before sending your first email:
Step 4 — Your Zoho Mail inbox is ready to customise and use
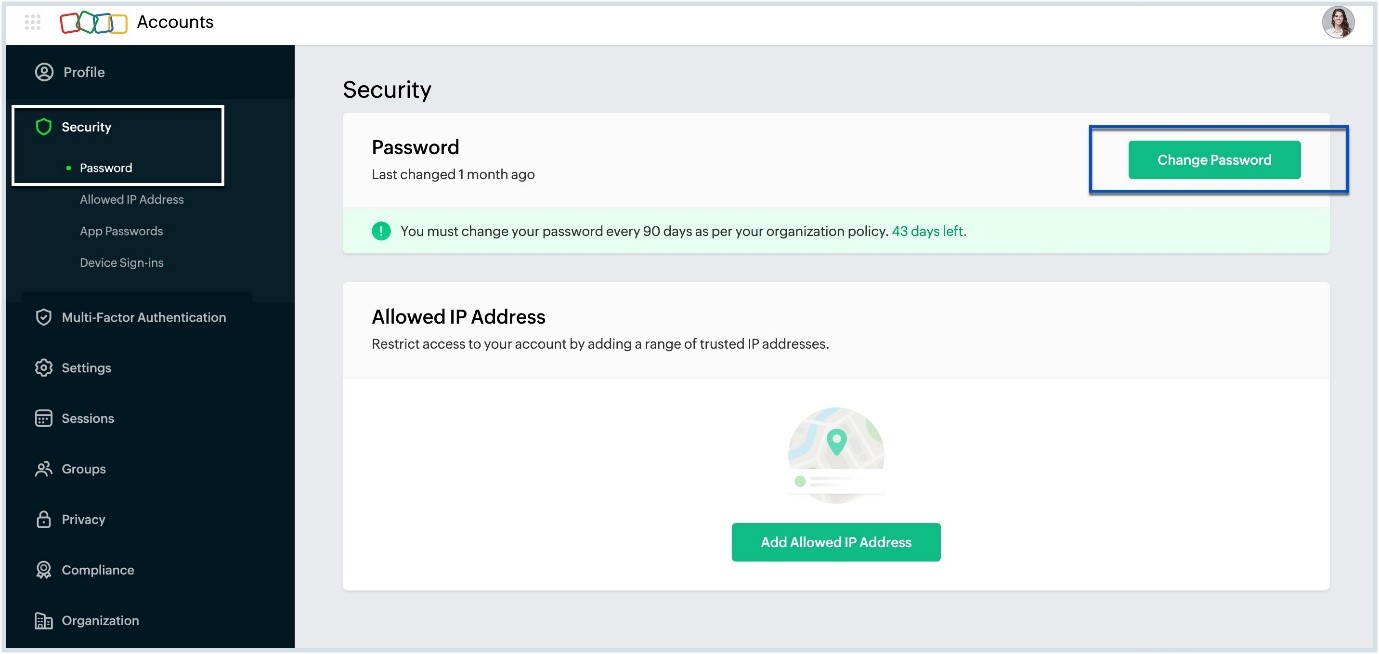
This final step is critically important. Go to Settings → Security → Two-Factor Authentication and enable it immediately. With 2FA active, even if someone discovers your password, they cannot access your account without the second verification step — protecting your personal emails, contacts, and files from unauthorised access.
💎 Zoho Mail Features That Make Daily Email Better
Once your account is set up, here’s what you’ll discover makes Zoho Mail one of the best free personal email services available today:
❓ Frequently Asked Questions
🚀 Final Thoughts — Your Clean, Private Inbox Awaits
Setting up a Zoho personal email account is one of the smartest and fastest digital moves you can make in 2025. In under 10 minutes, you get a professional, privacy-first inbox — completely free, completely ad-free, and backed by Zoho’s trusted global infrastructure.
Whether you’re a student building your first professional identity, a freelancer managing client communication, or someone who simply wants a cleaner email experience away from surveillance advertising — Zoho Mail is ready for you from the moment you sign up.
📧 Ready for a Professional Business Email?
Get a custom domain email like yourname@yourcompany.com — set up by Avinya Infotech with full Zoho Mail configuration, security, and team onboarding included.
Get Your Business Email Setup Today →